Showing posts with label before and after. Show all posts

Thursday, July 17, 2014

The Painted Door

Painting Doors

Doors, especially front entry doors are the first thing people notice... Certainly visitors, or prospective buyers. A shabby or outdated front door is a very poor beginning to your house selling story, that's for certain. But here's the good news!  You don't need to replace your door to fix the problem, you can paint it and better yet, Do It Yourself!
What you will need:
What you will need:

What you will need:
  • 1 Gallon Exterior Paint with Primer (lots of brands to choose from, Behr, Valspar, Sherwin Williams)
  • Painters Tape
  • Small Roller and small roller tray
  • Foam paint applicator
  • Craft knife 

How to Paint a Door in 4 Easy Steps

  1. First, tape off the hardware and any windows your door may have.  
  2. Use the craft knife to cut the tape exactly for nice, clean lines. Use a light touch with the knife so you don't leave deep scratches.
  3. Start at the top with the roller and paint your way down the door.
  4. Take your foam paint applicator thingy and fill in where the roller couldn't reach.
 Surprisingly the paint dries fairly quickly. Now these instructions are for painting a door that's in good/fair shape and doesn't need any real repairs. For those you have to take the door off the hinges and actually work. ;)  This is just for a quickie paint job to freshen up an old entry way. You'd be amazed at what a coat of paint will do!
In the above photo, the outdated and distracting screen door was removed to reveal a much prettier and modern door. Taping around the hardware takes longer than applying the paint, it's so easy, and look at the difference!  (The nice planters help, too.)

Tip: DO NOT send your husband alone to the home improvement store to pick out your paint.You never know what you'll end up with. I know they mean well, but... some people just need more supervision than others. You tell them you want Black, "But the green was on SALE," they'll say.
Tsk, tsk.

Updating Door Hardware

I live in a house that was built in 1996. It is simply crammed with fake brass. I mean, it is everywhere, from the light fixtures, the sink and tub fixtures, even the door knobs and TOILET PAPER HOLDERS. It's e v e r y w h e r e !  I will just have to replace the sink and tub fixtures, but I found a trick to updating the door knobs that is so easy, you'll doubt me. But I'm 100% serious. The secret:
You got it. Spray paint. Rust-oleum Universal Advanced Formula Paint and Primer in One spray paint. The color I chose was Carbon Mist but it comes in a wide variety of colors, even metallic finishes like nickel and hammered bronze. And it adheres to any surface. MOST IMPORTANTLY, it wears beautifully. I haven't had to retouch any of the door handles painted with this magic in a can.

Now, to paint the door hardware, you do have to remove it. This is a good opportunity to put your husband to work. It makes them feel "like they're helping."  Gotta feed the ego...
At the insistence of my husband, I roughed up the brass metal surface, but it was just to keep him happy. The instructions on the can say you don't need this step. Sigh. But they turned out nicely, so I can't complain TOO much.

So these are tricks I learned working on my own house, but thought they might be useful if you are trying to sell a house and need an easy fix for outdated doors and/or hardware. When selling a house, there can be a lot that needs updating. Tackle the things you can do yourself, and cheaply. See what a difference that makes. It might even make such an impact that potential buyers overlook the bigger ticket items like new carpeting or updated showers. It will at least give you some room when it comes to negotiating: the fewer things that need updating, the better off you are as the Seller.

I think I showed you in another post how I spray painted the light fixtures:

I've even done one of the toilet paper holders, but do I need to bore you with that? You can take my word for it.  I'll snap a shot the next time I'm in the guest bath and show you what a difference it made. :)

Back to doors. How to choose a color?  My favorite is black. Either black, or red. Here are some gorgeous doors I found on Pinterest:
 Love this glossy finish:
A fabulous entry with a red door, very Feng Shui:
And another red door, beautifully done:

Remember to ask for exterior paint, and tell the paint person at the home improvement store that it's for your front exterior door. This will ensure you get the right formula of paint. The wrong formula will end up looking faded or chalky, which can only be corrected by repainting, so be sure to do it right the first time.  Good Luck with your beautiful doors!

Next: Porches

Tuesday, July 15, 2014

Making Your Space Your Own: Unless You're Selling

When you own your own home, you can do whatever you like to it. Lime green walls, purple walls, crazy window coverings, messed up carpet. But when you're selling, that all changes. This post is about a highly personalized room in my house, which is lovely, but if I were to sell it, it would have to go back to..well.. plain.  Buyers find personalization too distracting when they view your house. Anyway, on to my favorite room in my own house:

Before

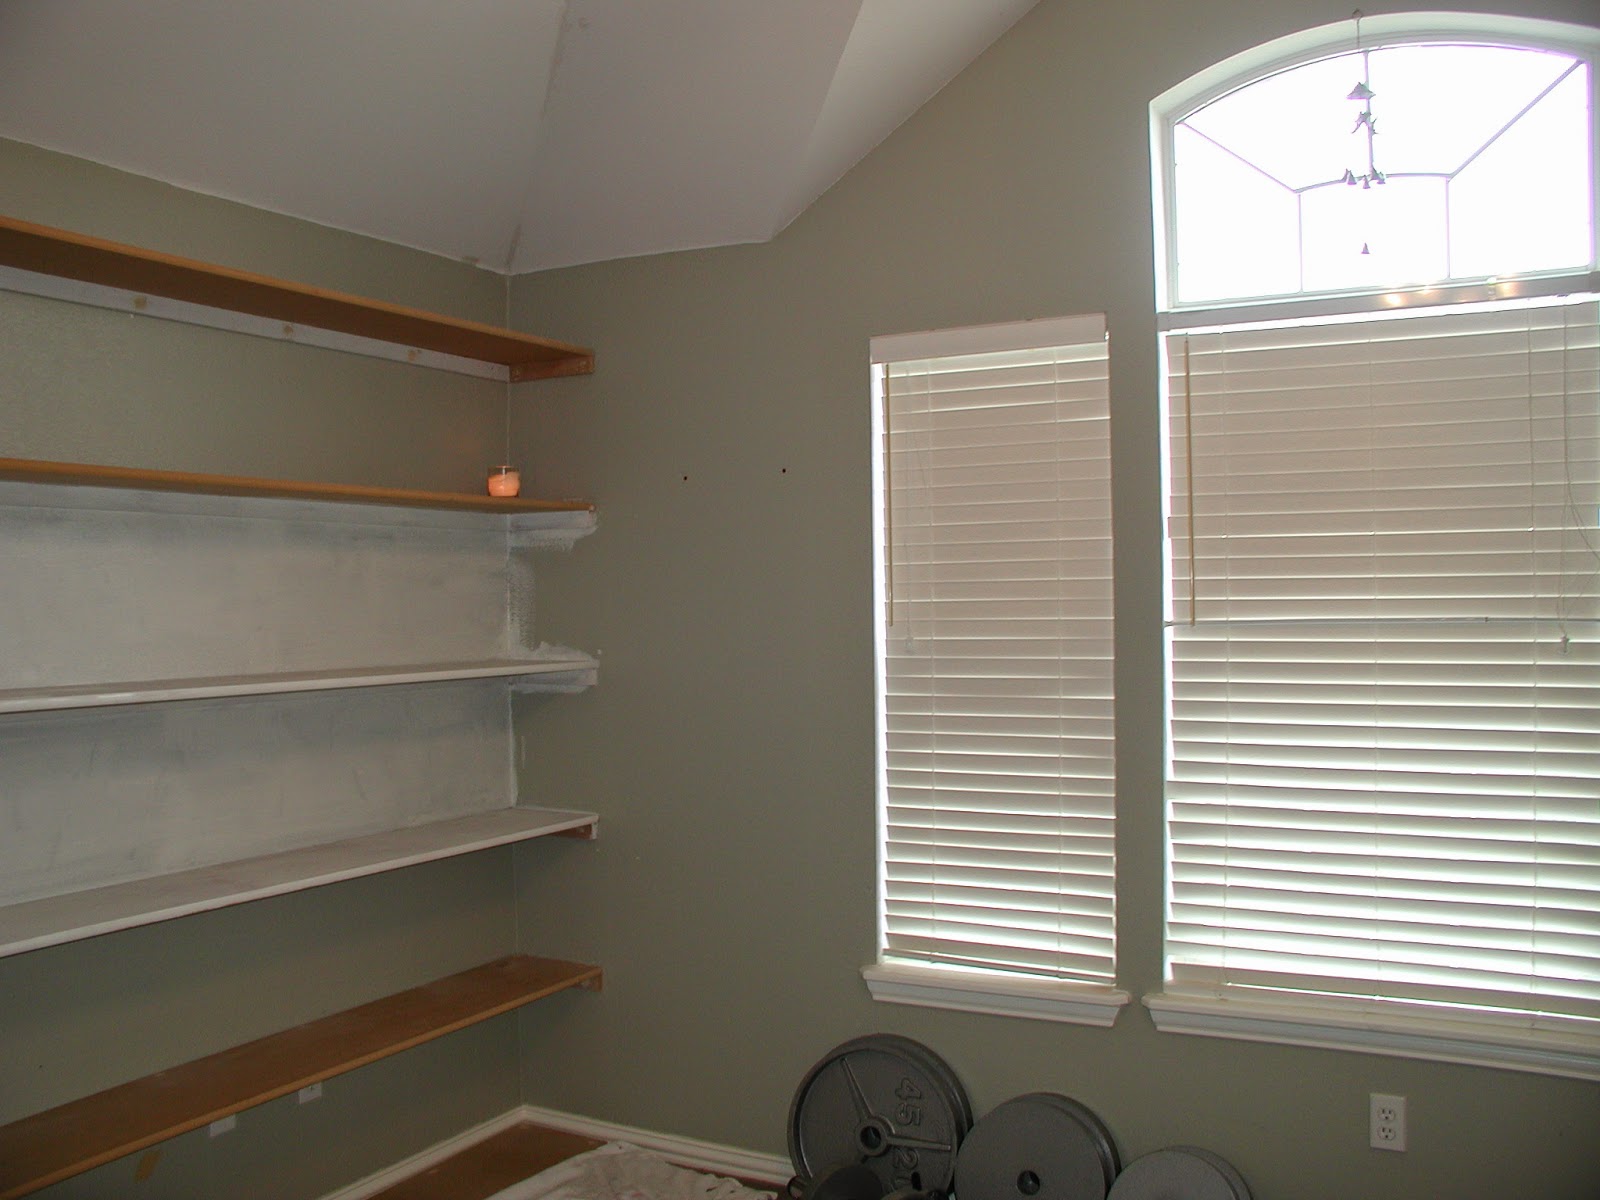
My studio has been many things since we moved into this house in 2001. It started as a home office, with a big cherry desk and cherry finish book shelves. Very traditional (read: BORING). Then I started doing more art and needed the space. Before I could make it into an art studio, I needed shelves, which my husband very handily built for me:
You can kind of see the boring light sage green it was painted before when it was just a home office. Say goodbye to drab!

During

When I was creating art full time and teaching kid's art in the studio, messes didn't matter. I completely ruined the carpeting that was in there, but at the time it was ok. My daughter Alex is also very artistic and as long as she was in the studio, she could make art freely without worrying about making a mess. To an outsider, it may have looked like a mess already!
And I found these benches in a neighbor's trash, which I immediately reupholstered:

As a result of growing up with a free space to create, Alex is now a very talented and insightful artist.

Then the studio took on sort of a gypsy feel, with colored scarves in the windows and tiny white lights sparkling across the ceiling. I loved making art in here, or just to curl up with a good book. (See the new upholstery on the free benches? I got it on clearance at Hobby Lobby for $1/yard!)


  Here's what it looked like at night:

So after I started back to school in 2011, I could no longer dedicate myself to art full time. I did, however, need a space to chill, do yoga, read, and do homework. So we redid the room again:

A desk for writing and school work:
Notice: no more carpet! Dark stained bamboo flooring that we did ourselves!
For my birthday I got a big screen Smart TV. One of the free apps is Yoga!
The hubby even installed a surround sound system for my yoga and meditation music. It's not bad for Netflix, either lol!
Sound system: Why do cats always migrate to your electronics?
And my sitting/reading/meditation space:
As I said, this is my favorite room in this house. I want to do bamboo floors in more of the rooms, too. I detest carpeting!

So this room has really gone through a lot of changes in the 13 years we've lived here.

But your space is YOURS and should change and grow with you. Once you buy your own home, you can do whatever you like. Now, if you're selling, of course my advice is to go as neutral as possible!  Potential buyers want to imagine themselves in your house, and they can't do that if you have a lot of personalization going on. But we're not selling any time soon and I think I should enjoy this space while I'm here. Don't you agree?


Next: Saving Money on Landscaping


Wednesday, July 9, 2014

Room Makeovers: A Little TLC is All You Need

Room Makeovers

Sometimes when you have a house to sell, there is that one room... You know the room I'm talking about. Sticks out like a sore thumb?  This is a real shame when the rest of the house is cute because most people want the house to be completely move-in ready when they purchase it.  That one room can ruin a sale.  Take this room for instance:
I mean, oh my goodness. Look how neutral everything else is, and then THAT PAINT! Now is a great time to talk about paint. Ahem.

My paint of choice is Behr Premium Plus, Paint and Primer in one. Yes, it's a little pricier than say, Glidden. A can of Behr will run you about $35.  But when you have a job like this, you are going to need the good stuff.  I can't even imagine a reason to paint a room this color. The rest of the house was cute!

Tips for Sellers: If you are selling your house, paint the walls a neutral color. Even white would be better than bright orange. But there are beautiful shades of grey or taupe that would have looked nice with the carpet in the photo above. You never want potential buyers to be making a mental list of things to change or fix when they are looking at your house. You want them to be imagining their own furniture in your house as if it were theirs already.  NO ORANGE.

My house is not on the market, but I do have some pretty dramatic before and after pics of room makeovers I did on my own.  Here is one of Alex's room we did last year:
The lime green was fun when she was younger, but when she turned 14 she decided she wanted something a little more sophisticated. The color we covered the green with is Behr Grey Squirrel. It is a grey with brown undertones, which goes great with the neutral carpeting in my house. I was quite relieved to get rid of the green. ;)
This is the master bedroom. As you can see, I nearly forgot to take a before pic! But look how much warmer the room gets when we replaced the stark white with a neutral taupe. But buyers can be fickle... some want every room to be white, and I've heard that painting everything white helps a house sell more quickly.  When we bought this house in 2001, every square inch was white. As an artist, I could not WAIT to get some color on the walls!  Ok, one more to show you:
This is our breakfast area. We painted the entire downstairs in Behr Grey Squirrel and one other lighter shade of the same color (can't remember the name). The breakfast area is the lighter grey and I just love it. Same furniture, only the light fixture is different; it was ugly brass before and I spray painted it black:
I used a high temperature spray paint in black which also happened to be matte (surprise!) but I really love how it updated that 1990's brass with a more modern feel to it.  I did the same thing with the light in the formal dining room:
Black spray paint to the rescue!  Now IF I were to show my house (which I'm not- my husband says we are never, ever, ever moving...) then potential buyers would see the black light fixtures and think we paid to update the lighting. Nope, underneath is still the builder's grade brass from 1996 when the house was built. (Shh!  It'll be our little secret!)

I will leave you with this photo. On the left is my sitting room, painted taupe. We decided a few years ago we were tired of the formal cherry wood furniture and jewel tones and completely redid everything in shades of grey.  This one room is the single transformation I'm not all that excited about. Not sure why, but the grey in here looks cold.  What does it need? Side tables? Black and white photos instead of that mirror? Leave your suggestions in my comments, if you have any ideas, and I will post pictures of the changes!

Update 7/30/14 I added end tables and some more pops of that turquoise color on the right hand side. Plus I took the photo with my new wide angle zoom lens, so let's compare!
I also changed out the rug. I like this one much better. Now it feels more balanced in there. I'm still working on the black and white photos to replace that mirror.  Stay tuned!


Next post: Trash to Treasure