Friday, July 25, 2014

Basic Rules of Thumb When Selling a Home

I thought it might be useful to go over a checklist of what I call "the minimums" when getting a house ready to show and sell.  We could always go far and above these minimums, but these are things I consider vital, whether the owner, the agent, or the staging consultant does it, they need to be done.

Curb Appeal

Curb appeal is the whole premise of my job as a staging consultant. But what does it mean?  Curb appeal refers to the attractiveness of a property before you even get out of the car. There are very simple ways to improve your curb appeal and then there are elaborate ways to do it. I will discuss both.


Air Conditioning Units

You could buy a nice car for what you would pay for two air conditioning units, which most houses over 1,500 sq. ft. have.  But just because they cost a small fortune doesn't mean people want to see them by the side of the house. Even if they are located behind your fence in the backyard and not visible from the street, they will be visible when the house gets shown. They should be accessible but not easily visible.

This can be done with simple shrubbery, or with a vine covered trellis like this one:

There are simple solutions:
To more elaborate ones:

A quick fix that a Staging Consultant can do is to buy (or build if you're a stud like me) a short piece of fence and paint it to match whatever is around it: either match it to the house color or to the stain on the main fence around the house. This can be done very inexpensively. You can even add mulch and a couple of plants in front of the fence barrier to further disguise it. You want it to disappear and not be noticed at all from the street.

Trash Cans

Many Home Owners Associations have rules about trash cans, but even if you don't have the HOA breathing down your neck you should never, I repeat NEVER leave your trash cans out where they can be seen from the street. Unless it is trash day, those nasty hunks of industrial plastic on wheels need to be parked behind SOMETHING. Same rule as with the A/C units. If you can't wheel them into the backyard, construct a barrier and add some simple landscaping to store your trashcans behind.

From simple:
To more elaborate:
Either will do. But you must.

I can't tell you how many listings I've seen where the primary photo of the house shows the trash cans in the picture. Tacky, tacky and detracting from the more attractive selling points of the house. Our trashcan has its place just inside our back gate and has its own little parking lot of pave stones we laid 1) to have a surface so that on rainy days the wheels wouldn't get stuck and 2) to make it look more like the space had a genuine purpose, which it does.  Same with our A/C units. We have paving stones as a border to match the rest of the flower beds, landscaping and mulch around the units. Luckily ours are not in view of the back door or patio.  They are in the same corner of the yard as the trashcans. HIDDEN!

Cleaning

I know we've discussed cleaning more than once. The home, especially when it's occupied, must stay in showing condition at all times. Most Agents can give you about an hour notice before bringing buyers by, so have a quick stash plan in case you are caught off guard with a mess. This can be done with baskets for kids' toys, cubby style storage for shoes or sports gear for older kids, hooks for backpacks during the school year, anything that will help you "stash and dash" so your house looks great when the potential buyers show up. When you sign with an Agent, specify that you do need a minimum of one hour before showing. This will buy you some time to wipe off the counter tops as well.

Photos

You know the saying, "A picture is worth a thousand words." Well, when listing a house, especially with today's Internet technology, great photographs can really increase the traffic of potential buyers. Listings with sub par photos get passed right over. It's a marketing thing, a psychological thing, a visual thing, but it's A THING. Stage your house to perfection and take great photos, a minimum of two per room. I know I've fallen in love with houses just based on the online photo tours; it's a fact that many potential buyers will have the same reaction. As a Staging Consultant, part of what I do after perfecting everything is take the photographs for the Agents to use in the listings. I take and edit the photos in high resolution, straightening, cropping, editing them to show off the most attractive selling points of the home. Good photographs also answer a lot of Buyer questions before they ever see the house, which also helps the Agent do his or her job more efficiently when showing it.

One Last Thing

For those of you with pets, it is very (very) VERY important to keep their... err.. waste, cleaned up.
1. If you have cats, you'll have at least one litter box. Clean it out daily, or twice daily and use some baking soda based deodorizer. People do NOT want a house that smells like a litter box. 2. Dogs. Dogs normally do their business in the back yard. Well, potential buyers are going to be walking the whole property, and poop on a Buyer's shoe is very bad luck. Poop on an Agent's shoe is even worse. Make the rounds with a pooper scooper at least once a day.

So these are some basic Rules of Thumb. Thumbs. Why can't I get that to sound right?

If you have tips you want to share, please leave them in the comments and I will include them in a future post!

Next: My First House Flip (a true story!)

Thursday, July 24, 2014

Windows: Let the Sun Shine In!

Windows

Sometimes it's hard to tell just how dirty your windows are until you clean them, especially on the exterior of your home where weather, dust and dirt builds up over time.  A good rule of thumb is to clean your windows twice a year: Spring and Fall. If you can only manage once a year, do it in the Spring after winter has come and gone and left you with filmy, dusty windows.

Look at the difference a clean window makes. You want potential buyers to be able to see: 1) the natural light coming in, and 2) the views from inside the house.


I'm not sure how long these windows had been neglected, but when they were filthy it just made the house seem cheap and neglected. Look at the difference we made just by cleaning them!

Now, one of the reasons I have my windows cleaned again in the Fall is because holidays are right around the corner and if you decorate your home like I do, you want your house to look especially beautiful during the holiday light season.  When I decorate, I consider what it's going to look like from the street as well as from inside.  Clean windows are a must!

Window Boxes

What would a post about windows be without at least one photo of a nicely designed window box? Window boxes are an easy way to add more greenery and color to the exterior of your home, and add a nostalgic look, too.  Like you see in Italy with the arched windows, brightly painted shutters and gorgeous window boxes filled with flowers and herbs.


For all exterior surfaces, including windows, 
I use this with a high pressure garden hose attachment:
Especially handy for 2nd story windows where you just can't reach to clean them. There are other products that are similar. One thing to look for when you are choosing one is if it's "Rinse" or "No Rinse."  Some cleaners need to be rinsed off the glass or else it will just look filmy again when it dries. I like the no rinse formulas simply because it saves me a step and I don't have to go around the house twice.


Next: Basic Rule of Thumb. Rules of Thumb. Thumbs. Gosh. 

Sunday, July 20, 2014

So What Does a Staging Consultant Do?

Selling a House

To sell a house, it needs to be listed with a real estate agent, or it can be sold "by owner." Either way, the house has to be shown to potential buyers.  When you are selling a house, you want it to look its very best. That's where the Staging Consultant comes in. He or she comes and looks over every room thoroughly, making a list of things to do to the house to make it show ready.

If the house is vacant, the Consultant works directly with the real estate agent and they agree on what needs to be done to the house to make it ready to list and show. This is mostly what I do.

If the house is occupied, but wants to be on the market for sale, then the Staging Consultant works with the home owners (and sometimes agent) to re-stage each room to its full potential using things that are already in the home. This could mean rearranging furniture, de-cluttering, cleaning, moving furniture out and into storage, and updating the landscaping.  Most of this can be done without spending a dime. It's all just a matter of looking at a room with a fresh set of eyes and setting it up so that the highlights of the room are spotlighted.

The following staging was done without spending any money. In this bedroom, the junk was removed and a bed was brought in from the garage. The blinds were raised all the way to show off that awesome window and a lamp, also from another part of the house was added in the corner to add some ambiance. Of course everything was cleaned. Cost: $0.00  

Next: the Kitchen
This kitchen had lots of potential, but all of its good points were missed because of all the clutter, on the counter tops, the stove and the fridge. All of that was removed and the wood cabinets were cleaned. The extra shelf was brought in from another room and holds a lot of the items that were cluttering up the counter space. Cost $0.00


This was perhaps the most dramatic change made in this house. All of the toys were moved to the kid's rooms; the white sofa was moved to storage, and the whole room was de-cluttered. The area rug was removed and WOW!
See, NOW we notice the nice chandelier fixture, the double glass doors, the marble counter top and the hardwood floors, whereas before all you saw was a mess of toys. A small table was moved from the kitchen area and topped with a nice centerpiece. The room took on a brand new air of sophistication. Again, $0.00.  This house was sold for the asking price within a week of the re-staging.

Here is another house that was occupied, that the owners actually had staging in their budget ($1,000) so there was money for a few small changes that made huge differences:

Most of the staging in this house was de-cluttering. In the bedroom, the outdated bedding and curtains were replaced and a large mirror was put over the bed.  Cost: $180, Target.com


In the kitchen, the clutter (oh my) was removed from the fridge and counter tops, and two new bar chairs were added at the right height to make that portion of the counter space useable in a whole new way. The owners wondered why they had never thought of that. It's perfect for a kid's eating area as well. Cost: $180, 2 chairs from Rooms To Go


This finished basement was definitely a diamond in the rough. It had been used as an extra TV room but had also been the dumping grounds for more clutter. The windows were cleaned, which improved the natural light in the room. Once the clutter was cleaned out, a side table, a second lamp and a piece of artwork was added. Even though there was furniture added to this room, it looks a whole lot bigger, and its purpose is known right away. Now when you look at it you can tell it's a media area (dare I say, "man cave?")! Cost: lamp, side table, poster $165 at a local consignment store.
So the total homeowner investment was $525, $475 under budget! (Win!). The house was re-photographed and the listing updated; they got two offers the first week and by the end of that month had sold their home for the asking price.

Selling No-No's

Here are a few things that definitely turn potential buyers away. I always make sure these are clean before I stage and photograph for my Agents. If you are selling, take note; this is unacceptable:

Here is a tile shower with a fully tiled bench; a real asset to a master bath, but NOT when it looks like it's never been cleaned. Here is before and after:
To clean moldy tile or discolored grout, usually my standby cleaner of choice is Clorox Cleanup. But if the tile is too far gone for that, I mix bleach with baking soda and put in some elbow grease to scrub it all down. If the house is occupied, I might suggest these things for the owners to do; however, if the house is vacant, that leaves one person (you guessed it, Me) the Staging Consultant with Cleaning Super Powers. I actually don't mind doing it, because I know how much of an impact it has when the agents are showing the house. They always appreciate it, too.

Landscaping

Landscaping is such an important part of your curb appeal, which is essential to sell a house. But in these two examples, all that was done to vastly improve it was (Surprise!) cleaning:

This house has a gorgeous flagstone walkway leading up to their front door. But who would notice it under all that dirt?  Cost: $24 at Sears for the Outdoor Windex Cleaner and hose attachment.


This house was an older home that at first glance we thought we would have to repaint. As it turns out, window cleaner and spraying with a garden hose was all it needed!  Cost: $24 at Sears for Windex Outdoor Cleaner and high pressure garden hose attachment.


This is what I use for outdoor surfaces, with a high pressure attachment on a regular garden hose. It works on windows, porches, walkways, siding, patios, driveways, garage doors, brick, anything on the exterior of the house that gets dirty:

Here is an example of an easy and inexpensive way to brighten up an otherwise neglected looking spot outside. There's my Spider plant in the middle, with some flowering annuals I got on sale at Home Depot. Plus I freshened up the mulch. Cost: $14 for a flat of annuals and a bag of mulch:

Here's a corner of my own yard that was in desperate need of some love:
See how much better it looks? But also how it *feels. You want potential buyers to see your landscaping and get the feeling that the house and yard has been loved and well taken care of. 


Not all Staging Consultants are willing to get down on their hands and knees to clean moldy grout in a tiled shower, nor are they prepared to clean out landscaping or do windows. I actually enjoy doing these things because of the dramatic difference it can make to the appeal of the home. Agents hire me because I don't mind getting my hands dirty if that's what it takes to get a house ready for them to show, and more importantly, SELL.

A typical job goes something like this:
  1. An agent calls me and we arrange to meet at the house.
  2. We do a walk thru, inside and out, while we make a list together of things that need to be done.
  3. I give her a time estimate as to how long I think it will take me to finish everything on the list and we agree on a price per square foot (that's how I bill, see below) for my time (I charge more for heavy cleaning and less if the house is already fairly clean) and materials (mulch, annual plants, cleaning supplies, touch up paint, etc.).
  4. The agent gives me the code to the key box and I get to work. I try to remember to take "before" pictures but I'm so bad at forgetting that!  After the work is done, I do take professional grade photos, at least two to three shots of every room, highlighting the best selling points and architectural details in the photos. I then edit the photos to make sure they look professional and in high definition. Photos are so important when listing a house!
  5. I get the photos to my Agent and she composes the listing. Sometimes she includes all the improvements I've made in my staging process such as "updated landscaping" or "super clean inside and out!"  I love that. And Yes, I would be guilty of going to the MLS listing to admire my own work. :)

More About My Pricing


For example, a 2500 sq. ft. house, *unoccupied* with 4 bedrooms, 2.5 baths with showers, tile, carpet and wood flooring:
  • Medium-high degree of interior cleaning (kitchen, all baths, toilets, blinds, vacuum and steam clean the floors, garage interior, ceiling fans, fireplace) and exterior cleaning (pick up trash, rake out flower beds, wash off walkways) and landscaping (adding mulch and annual flowers) and then taking and editing the photos, I charge .25/sq ft or $625 for time and materials such as cleaning supplies, mulch and annual flowers. 
  • For the same size house, unoccupied, for a light cleaning and photographing I charge .15/sq ft or $375. 
  • For a major overhaul that includes heavy cleaning, painting interior rooms, cleaning out junk or furniture left behind by previous owners or renters, trimming outside hedges and/or trees, mowing and edging the yards, deep cleaning of stained or damaged carpeting, or heavily stained tile and grout, I charge .40/sq ft or $1000 for a 2500 sq. ft. house which includes time and materials such as heavy duty cleaning supplies, spackle, Behr premium paint, mulch, annuals. 
  • For a house that is show-ready but just needs good photographs I charge a flat fee of $125.
Note: I prefer to be paid after the work gets done rather than waiting for the house to close. The number one reason for this is that houses for sale often are not sold by the original Agent that listed it (and hired me). A change in Agent most likely means I would not be paid. Another reason for being paid upfront is that it could take 6 months or more to sell the house, which would mean I would be waiting that long to be paid. I can't stay in business without getting paid, so these are my stipulations. There are always exceptions, though, so I do try to remain flexible.

Saturday, July 19, 2014

Backyard Staging

Backyard Staging

First things, first: the cleaning. Chances are if a house has been vacant for a while, things in the backyard landscaping probably need some TLC.  Trim the hedges, make sure it's getting mowed regularly, and of course clean out any grass or weeds in the flower beds.  Some properties may have been REALLY neglected, but in my experience, CLEANING was all it needed.

Example: the backyard where my daughter was renting was horrendous. But it was so big, it was too overwhelming for her to do anything about it. That's where I stepped in. Out of all the work we did to that back yard, 80% of it was cleaning.

Here's a before pic of the concrete patio in the very back of the yard. Totally unusable:
Not sure if you can tell from this photo but there were two giant rolls of metal fencing material on the concrete, along with several inches of dirt and weeds covering most of the patio.  I had the fencing hauled off (Freecycle! So it was put to good use) and took a weed eater to the concrete to get all the dirt and weeds off the surface. After it was edged, I cleaned it off with the garden hose sprayer.

I had two outdoor chairs and an outdoor table (Freecycle again!) and this was the end result:
Price of this project: $0.00!
Now if I owned this house, this would be the perfect spot for a Pergola! I would repair and do a decorative concrete treatment, stone edging and more landscaping. String white lights and maybe even add a fire pit, wouldn't that be cool?

Here is another perfect example of a patio just teeming with potential. First: cleaning. Always. Suggested staging ideas:
  • planters on each side of the back door
  • a 5'x7' indoor/outdoor rug ($35-$200 depending on where you shop)
  • ask if you can paint the door (optional, but would add so much)
  • a small bistro table set (Freecycle, thrift store, or buy new.)
Here's an idea for the painted door. It even looks cute from the inside!

This wicker outdoor bistro set sells at www.target.com for $170:
And here's a cute idea for the 2 planters. If you know someone handy with building boxes, this could totally be a DIY project:

Expenses

Now you might be cringing at the thought of buying things for your staging needs. Keep in mind, these things belong to you and will be returned to you after the sale. You can use these things over and over, house to house and they will more than pay for themselves. 

Tip:  When not being used for staging, bring this stuff home with you. If it's furniture, use it! If it's containers of plants, decorate your own porch or interior of your house.  I have been known to take things out of my own home to stage a property!  As long as it's in good shape, make use of it. Just remind the agent to mention to potential buyers that the furniture and landscaping containers don't come with the house. Anything you put in the ground stays, obviously. ;)


Next: Windows


Friday, July 18, 2014

Porches

No, unfortunately we are not talking about Porsches. Although this one would look smashing in my driveway.


Porches

Yes, Porches. The front and sometimes back areas of homes just outside the door. It's what sits between the doorway and the yard, and they come in all shapes, sizes and styles. In this post I wanted to showcase some spectacular porches which would be something to aspire to once you buy your property, or if you own already.  Secondly, I want to show porches with potential, so that when you are looking at properties you can picture all the wonderful things that can be done to front and back porch areas. I will also include staging ideas, of course, since that is the point of all this. ;)

Front Porches

Large front porches are more commonly found with older, southern style houses. Wrap around porches are truly a valuable commodity if you can find them. Here are some photos of some nicely outfitted front porches:

This porch is plain concrete and not very big, but the owners have made the most of it by adding lantern lighting and gorgeous planters on either side of that beautiful wood door. This is what I call making the most of what you've got. Picture this without the lighting, planters and with an ugly white metal door. Terrible, but that may be how they found it, and look what a difference a little style can make! 
Next up is a larger, covered porch where the residents probably do a lot of sitting and visiting. I know I would if my front porch was this lovely! Notice the homey feel that those two indoor/outdoor rugs give the space. Really I think the rugs are the key to what makes this porch fabulous; otherwise it's just a couple of black metal chairs, really. See what a decorator's touch can do? Hmm? I think you do.

Tip: Great resources for indoor/outdoor rugs are Target.com, Home Depot, Lowe's and BallardDesigns.com just to name a few. The rugs' popularity is growing, and you can see why. Gone are the days of ugly mats outside. Now you can have a Persian rug outdoors if you like!


Now here is a LOVELY space that is stunning, but in reality very very simple. Besides the covered front porch, there are only two elements, the swing and a planter, yet it is breathtaking! Who would not want to curl up on that swing with some tea and a good book and just sit for hours?

Now this is one is almost too perfect, but it was on Pinterest so it has to be real, right? This porch was obviously made for entertaining. Who wouldn't want to have a party out here? I can't see the rest of the house but I can almost guarantee it is a stately Southern mansion. I just love the dark finish on the wooden slats of the porch base. This has obviously been very well taken care of. It would be beautiful even without all that furniture on it; just that floor and those planters are enough.

Back Porches and Pergolas

Back porches are typically not as stately as the front porch, because fewer people see it. But making the most of your back porch really adds to the character and welcoming factor of your back yard space. Here is one I just love, and in fact plan on doing something very similar to this to my own house, just without the fire pit. We don't need anything any more flammable than the grill that close to the house:

Here is a creative way to make the most out of a small, otherwise unused space on a back porch:
I can see my daughter, Alex planted right there with a book or her computer for hours!

Porch Floors

I don't know if "porch floors" sounds right, but you all know what I mean, right? The deck part. Or concrete. Or exposed aggregate. Whatever your feet are touching when you walk out there!

Painted Wood

Here someone got super creative and painted their own rug right onto the planks of their porch and I LOVE IT! I have a feeling this will only look better with age, too which is always a good quality to have in a decorative element:

Concrete

There are many ways to treat concrete, from simply painting it with exterior paint to really getting artistic with it.  Here are a few examples of each:

I love this one! And so easy to do. You mark off the design with painter's tape and do one color at a time. So charming!
Here is the same design on a larger scale: {LOVE THIS}


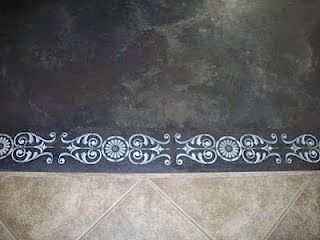
Here is a very simple but pretty painted border on a concrete porch:
The thing about concrete is that it's everywhere, and usually ugly. But that means it has *Potential!* And with the right set of instructions (do your research!) you can do this yourself.


When staging a house, of course you need the home owner's permission and probably funds to do something like this, but if it's something simple and you present it right, it really can add value to the property if done correctly.


Remember, aaaanything is better than this:
Next: Backyard Staging

Thursday, July 17, 2014

The Painted Door

Painting Doors

Doors, especially front entry doors are the first thing people notice... Certainly visitors, or prospective buyers. A shabby or outdated front door is a very poor beginning to your house selling story, that's for certain. But here's the good news!  You don't need to replace your door to fix the problem, you can paint it and better yet, Do It Yourself!
What you will need:
What you will need:

What you will need:
  • 1 Gallon Exterior Paint with Primer (lots of brands to choose from, Behr, Valspar, Sherwin Williams)
  • Painters Tape
  • Small Roller and small roller tray
  • Foam paint applicator
  • Craft knife 

How to Paint a Door in 4 Easy Steps

  1. First, tape off the hardware and any windows your door may have.  
  2. Use the craft knife to cut the tape exactly for nice, clean lines. Use a light touch with the knife so you don't leave deep scratches.
  3. Start at the top with the roller and paint your way down the door.
  4. Take your foam paint applicator thingy and fill in where the roller couldn't reach.
 Surprisingly the paint dries fairly quickly. Now these instructions are for painting a door that's in good/fair shape and doesn't need any real repairs. For those you have to take the door off the hinges and actually work. ;)  This is just for a quickie paint job to freshen up an old entry way. You'd be amazed at what a coat of paint will do!
In the above photo, the outdated and distracting screen door was removed to reveal a much prettier and modern door. Taping around the hardware takes longer than applying the paint, it's so easy, and look at the difference!  (The nice planters help, too.)

Tip: DO NOT send your husband alone to the home improvement store to pick out your paint.You never know what you'll end up with. I know they mean well, but... some people just need more supervision than others. You tell them you want Black, "But the green was on SALE," they'll say.
Tsk, tsk.

Updating Door Hardware

I live in a house that was built in 1996. It is simply crammed with fake brass. I mean, it is everywhere, from the light fixtures, the sink and tub fixtures, even the door knobs and TOILET PAPER HOLDERS. It's e v e r y w h e r e !  I will just have to replace the sink and tub fixtures, but I found a trick to updating the door knobs that is so easy, you'll doubt me. But I'm 100% serious. The secret:
You got it. Spray paint. Rust-oleum Universal Advanced Formula Paint and Primer in One spray paint. The color I chose was Carbon Mist but it comes in a wide variety of colors, even metallic finishes like nickel and hammered bronze. And it adheres to any surface. MOST IMPORTANTLY, it wears beautifully. I haven't had to retouch any of the door handles painted with this magic in a can.

Now, to paint the door hardware, you do have to remove it. This is a good opportunity to put your husband to work. It makes them feel "like they're helping."  Gotta feed the ego...
At the insistence of my husband, I roughed up the brass metal surface, but it was just to keep him happy. The instructions on the can say you don't need this step. Sigh. But they turned out nicely, so I can't complain TOO much.

So these are tricks I learned working on my own house, but thought they might be useful if you are trying to sell a house and need an easy fix for outdated doors and/or hardware. When selling a house, there can be a lot that needs updating. Tackle the things you can do yourself, and cheaply. See what a difference that makes. It might even make such an impact that potential buyers overlook the bigger ticket items like new carpeting or updated showers. It will at least give you some room when it comes to negotiating: the fewer things that need updating, the better off you are as the Seller.

I think I showed you in another post how I spray painted the light fixtures:

I've even done one of the toilet paper holders, but do I need to bore you with that? You can take my word for it.  I'll snap a shot the next time I'm in the guest bath and show you what a difference it made. :)

Back to doors. How to choose a color?  My favorite is black. Either black, or red. Here are some gorgeous doors I found on Pinterest:
 Love this glossy finish:
A fabulous entry with a red door, very Feng Shui:
And another red door, beautifully done:

Remember to ask for exterior paint, and tell the paint person at the home improvement store that it's for your front exterior door. This will ensure you get the right formula of paint. The wrong formula will end up looking faded or chalky, which can only be corrected by repainting, so be sure to do it right the first time.  Good Luck with your beautiful doors!

Next: Porches